Category Archives: Vegan

No animal products

Spicy Chocolate Chip Cookies

Posted on

So, I have now served these to three different audiences (and my husband as well) and everyone loves them.  I’ve made a few different versions of the cookie thus far and think I have the best option figured out.  I promise no one will know that these are vegan.  Remember to just not skimp on the fat (vegan butter) part of this, as that is what helps make the cookies so darn good.

Spicy Cookie Ingredients:

  • 8 Tbsp (1 stick) vegan butter (I used Earth Balance)
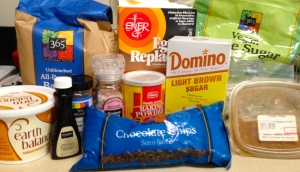
    Cookie Ingredients

    Cookie Ingredients

  • 1/2 cup brown sugar
  • 1/2 cup granulated sugar
  • 1/4 cup milk (I used unsweetened vanilla almond milk)
  • 1/2 tsp vanilla extract
  • 1 egg substitute (I used Ener-G)
  • 2 tsp baking powder
  • 1 to 1.5 tsp cayenne powder
  • 1 tsp ground cinnamon
  • 1/2 cup whole wheat flour
  • 1.5 cups white flour
  • 1.5 cups chocolate chips

Optional ingredients:

Cookie close up :)

Cookie close up 🙂

  • 3/4 cups chopped hazelnuts
  • 3/4 cups shredded coconut
  • pink Himalayan salt

Cream together the butter and sugars.

Creamed butter and sugars

Creamed butter and sugars

Add in the egg, milk, and vanilla.  Beat the mixture together well.  If using Ener-G egg replacer, add the 1 1/4 tsp of dry mixture to the milk with an extra two tablespoons of milk.

Liquids together

Liquids together

Add in the baking powder, cayenne, and cinnamon and mix well.  Finally, add in the whole wheat flour and mix.  Then add the white flour a half cup at a time.  Mix slowly.  Add in chocolate chips and any other of the add ins that you want. Refrigerate your dough.  It will make scooping the dough so much easier.

Ready to bake!

Ready to bake!

Heat the oven to 375 F.  Place the cookies about an inch to an inch and a half apart from each other.  If you cook on a silicone sheet, it will make removing the cookies that much easier.  Cook for 15 minutes.  The cookies won’t brown so much on top, so no worries about that.  Allow the cookies to cool then enjoy!

Coconut AND sea salt options

Coconut AND sea salt options

As for the options, I’ve found that using a full 1.5 tsp of cayenne pepper and chopped hazelnuts are the best option.  If you don’t want to add nuts, I’d suggest using dark chocolate with some Himalayan salt sprinkled on top.  Any way you have it, they will be delicious.  Other options may be to try using some tofu or apple sauce instead of egg or the Ener-G.  Also, try using coconut oil instead of the butter, which may work as well.

Ready to eat!

Ready to eat!

Granola Recipe

Posted on

I’ve had an irrational fear of making granola for a long time.  I have no idea why or what it was about, but for some reason the idea of making granola seemed so daunting.  Well, my package for my April foodie pen pal was about to go out and I wanted to make something home made.  I had most of the supplies, so it was a matter of picking up a few things and getting the courage to attempt to make granola for the first time.  I decided to go with a pretty basic recipe and then got fancy at the end with some coconut.  Hopefully the pen pal likes it!

Granola Ingredients:

  • 3 cups regular oats (do not use instant)

    Ingredients

    Ingredients

  • 8 oz sliced or slivered almonds
  • 8 oz dried cranberries
  • 6 oz sweetened coconut
  • 1/3 cup canola oil
  • 1/4 cup honey
  • 1/8 tsp cinnamon
  • 1/8 tsp salt
  • 4 tsp vanilla extract

In a large bag add the oats, almonds, and cranberries.  Add to these the cinnamon and the salt.  Mix the dry ingredients well.

Dry ingredients

Dry ingredients

Add to the bag the oil, honey, and extract.  Using either your hands or shaking the bag well, make sure everything is WELL coated.  The oil needs to coat the oats to allow them to toast evenly.

Wet ingredients added

Wet ingredients added

Line a baking sheet with either foil or parchment paper and spread the ingredients out evenly.

Ready to be baked

Ready to be baked

Set the oven for 325 F and cook the granola for 10 minutes.  After 10 minutes are up, add the coconut to the mixture and try to bring the stuff on the edges into the middle.

Coconut added

Coconut added

Cook the granola for another 10 minutes before again mixing the granola from the outside in.

Just 10 more minutes....

Just 10 more minutes….

Turn the oven down to 300 F and cook for one last 10 minutes.  Remove the granola promptly and allow to cool.  Enjoy!

Close up of finished product

Close up of finished product

Some variations are possible.  I’d probably try other dried fruits the next time.  Dried blueberries would be amazing!  I also think other nuts like pecans and walnuts would work really well.  I’d also want to try this with non-sweetened coconut.  I think that would save a bunch of calories without sacrificing taste.  Also, using coconut oil instead of canola oil or using agave syrup instead of honey would be great substitutions.

Charoset and more

Posted on
Charoset and more

I realize that posting a charoset recipe AFTER the seders is a bit late, but with all the craziness leading up to my seders I didn’t have a chance to post my recipe and photos.  I started with a traditional charoset then decided to do a bit of a twist in the end.  Traditional charoset is made with usually one type of apples, a sweet red wine, walnuts, and cinnamon.  You can either chop your apples and walnuts by hand or put them in a food processor to pulse mix.  I prefer a chunky charoset so I did mine by hand, but if you prefer more of a “paste”, go with the processor.

Charoset Ingredients:

  • 6 apples (I used two each of Gala, Macintosh, and Fuji)
  • 1/4 bottle of semi sweet red wine for Passover (cheap is good)
  • 1/2 tsp cinnamon (more or less to taste)
  • 3/4 cup toasted chopped walnuts
  • Optional ingredients: dried dates, preserved lemon

    Basic Ingredients

    Basic Ingredients

Spread the walnuts out on a lined baking sheet.  Set the oven to 350 F and put the pan in.  After 10 minutes shake the pan to turn the walnuts.  You will know when they are done as you will smell the nuts toasted.

Toasting Walnuts

Toasting Walnuts

Finely chop the apples in a small dice.  You could use your mandoline to either do even slices or julienne the apples then dice them further.  To the apples add the cinnamon and the 1/4 of a bottle of wine.  You want the apples coated, but not drowned in the wine.  When the walnuts have cooled, chop them in a rough chop  and add to the apples.

Apples in wine

Apples in wine

If you want to change up your charoset this year, take 5 (or more or less) dried dates and chop them.  Add these to the mixture.  I also used some of my preserved lemon peel to add a punch to the charoset.  I loved the taste, but you could used just some lemon rind instead.  Make this at LEAST 24 hours before you are going to serve it.  This allows the flavors to really meld together.

Optional ingredients

Optional ingredients


Now begs the question as to what to do with the rest of the bottle of wine.  Hopefully you did not purchase a very good bottle.  So, drinking is out of the question.  I used mine for a dessert.  I made poached pears in wine.  It’s an EASY dessert, I promise.  For each person prepare half a pear.  Chop a pear in half and spoon out the seeds.  Place the pears cut side down in a pan and add the rest of the bottle of wine and a few cinnamon sticks.  You can do this in the beginning of the day to let the pears soak up the wine.  After the dinner has cooked put the covered pears in the oven at 350 F.  While you’re eating dinner the pears will cook and be ready.  Place a pear and a bit of wine on a plate.  Top with a bit of honey, whipped cream, or mascarpone.  This can even be served at room temperature, so it’s really a SUPER easy dish with little to prepare and big rewards.

Vegan Moussaka

Posted on
Vegan Moussaka

Well, Passover is here.  This year I was in charge of the main dish for the vegetarians/vegans the first seder.  I’m off eggs and limit my dairy intake.  But apparently my sister has developed a lactose intolerance and a tree nut allergy.  Plus she doesn’t like mushrooms.  So my ideas for the main dish started to shrink considerably.  I’d had a vegetarian moussaka recently and thought I could recreate it for Passover using a milk substitute that is ok for Passover.  I got my inspiration for the recipe from the Avalon Wine website.   A word of warning.  I mostly keep Passover.  I don’t eat anything that’s specifically prohibited, but the milk I used did not have a kosher for Passover hecksher on it.  Flax has been approved by Star-K as ok for Passover, so I used the “milk” as my base for the bechamel.  If I didn’t have to deal with the tree nut allergy, I would have used almond milk, which you can find with a hecksher or make your own.  Another option would be to use cashew “cheeze” instead of a bechamel sauce.

Moussaka Ingredients:

  • 1 medium eggplant

    Moussaka Ingredients

    Moussaka Ingredients

  • 2 medium/large potatoes
  • 1/2 onion
  • 2-4 garlic cloves
  • 28 oz canned crushed tomatoes
  • 1 tsp oregano
  • 1/4 tsp cinnamon
  • Salt
  • Pepper
  • 1 tbsp olive oil

Using a mandoline cut the eggplant and the potatoes into even slices.  Place the eggplant in a collandar with salt to draw out some of the bitterness.  If you cut the potatoes at the same time as the eggplant, you can put the potatoes in a bowl of water to prevent the potatoes from browning.

In a saucepan, heat up the olive oil then add the chopped onion and the garlic cloves.  Heat until the onions are transluscent.  Add the salt, peppers, oregano, and cinnamon to the pan then the tomatoes.  Cook for about 10 more minutes.

Grease a pan and add a layer of the potatoes, the sauce, then the eggplant (that you’ve since rinsed off and patted dry).  Then add more sauce, potatoes, then eggplant.  Finish with the last of the sauce.  Cover the dish and put at 375 F for one and a half hours.  While that is baking, make the bechamel.

This slideshow requires JavaScript.

Vegan Bechamel

  • 2 tbsp olive oil
  • 3.5 tbsp matzo meal (I used whole wheat)
  • 2 cups milk of choice

In a saucepan heat the oil over medium high heat.  Add the matzo meal and whisk together.  The mixture should clump together.  Slowly add the milk to the pan and whisk well.  Lower the heat to medium low and allow  the mixture to thicken.  You will know the bechamel is  complete when it sticks to the back of a spoon.  It will thicken up more as it sits, so if need be, add more milk to thin out the sauce.

This slideshow requires JavaScript.

When the vegetables are completed spoon the bechamel on to the veggies and cook for another 20 to 30 minutes and allow the bechamel to brown more.

Bechamel added

Bechamel added

If you have used whole wheat matzo meal (or maybe whole wheat flour) the color will not be the appealing light brown.  It’s more of a brownish-grey in the end.  It’s not a really pretty dish.  But, it is good.  Like we had non-vegans at the seder who work at a restaurant and had seconds.  I’d say that was a hit :).

Finished product

Finished product

Preserved Meyer Lemons

Posted on
Preserved Meyer Lemons

It’s winter (almost spring!) and I’m slowly making my way through the jars of veggies I preserved this summer.  I still have some pickles, carrots, and tomatoes, but my hot peppers are long gone.  It’s a cue I guess for next year.  But in the mean time I had an itch to do SOMETHING in the kitchen.  So, I knew a bit ago that it was Meyer Lemon season and I’d never made preserved lemons before.  It seemed easy enough, so I gave it a try.

Salt Preserved Meyer Lemons

  • Meyer Lemons (about 4-5)
  • Kosher salt (non-iodine kind)
  • Sterile quart jar

The process is pretty simple.  Quarter the lemons, but DO NOT CUT ALL THE WAY THROUGH.  Put about a tablespoon or two of salt in the bottom of the jar.  Pour more salt into the cuts of the lemons so that the flesh gets covered.  Pack the jar with the cut lemons and then squish the lemons down.  REALLY pack them down and get the juices running.  If you have extra lemons that won’t fit in, you can juice them into the jar.  That’s all.  About every two days shake up the jar to make sure the lemons are covered with juice.  After three weeks the lemons should be ready.  Store in the fridge for up to a year.

This slideshow requires JavaScript.

I cannot WAIT to make this recipe.  I have been making my own salad dressing lately, so this would work GREAT!


Falafel Pie

Posted on

Do you like falafel?  But do you hate to have to make the little balls and possibly frying them?  I know I do.  I do really love enjoy eating falafel.  My favorite was in Israel on the street with fries in the pita (and lots of harissa!).  I made this recipe a few weeks ago for a potluck and I think it went over well.  This recipe is actually a two-fer as I’ll give a recipe for tzatziki sauce as well.  I got the recipe from a blog called The Vegan Stoner.  It’s actually a really great recipe site.  All the recipes are super quick and easy.

Ingredients:

Ingredients

Ingredients

  • Falafel mix
  • Hummus
  • Tomato
  • Cucumber
  • 10 oz soft silken tofu
  • lemon juice (from half a lemon)
  • dill
  • salt, pepper
  • optional: avocado, olives

Directions for Falafel Pie:

Mix falafel mix with prescribed amount of water and allow to sit for ten minutes.

Falafel mixed up

Falafel mixed up

In a greased pan, spread the falafel mix.  Bake at 425 F for 15 to 25 minutes (depending on your oven).

Falafel out of the oven

Falafel out of the oven

Bring the falafel out and allow to cool for  15ish minutes (until you can handle the pan).  Spread hummus in an even layer on to the falafel.

Hummus on top

Hummus on top

Top with you cut up veggies, such that you form circles (if you want to make it pretty).  Lastly, top with the tzatziki sauce.

Veggies added

Veggies added

Directions for Tzatziki Sauce:

Tzatziki sauce

Tzatziki sauce

In a blender (a magic bullet works GREAT), add the silken tofu, lemon juice, salt, and dill.  Blend for two minutes or until the mixture is smooth.  Add more lemon juice if need be.  Add some chopped cucumber to the tzatziki.

Finished pie

Finished pie

Happy Pi Day!

Chinese New Year Dinner

Posted on
Chinese New Year Dinner

My mom has organized a Chinese New Year dinner in Philadelphia for the past few years.  I haven’t been able to go for some reason or another, but this year my mother-in-law decided to treat my husband and I to it for our birthdays.  I must say that it was a great present.  First of all, the food is absolutely amazing.  I found every course to be wonderful, but some items were more amazing than others.  Secondly, the chef accommodated my food restrictions.  I was able to have a mostly vegan meal with only a bit of dairy in the mango puree.  Thirdly, the place is a BYOB AND there is no corkage fees!  I brought bourbon with ginger beer to drink with my meal, but there was wine, a drink called Cinnamon Toast Crunch (tastes like the milk leftover from the cereal sitting in it), margaritas, and plenty of other stuff.  Lastly, the place may not be the fanciest of places, but the chef was so personable that it made up for it.  A million times over for sure.

Here’s the list of the courses and food:

  • Appetizers:  Vegetable spring roll, salt crusted tofu, fruit salad (the one on the plate had mayo, which was switched out for one that did not), eggplant “hamburger”, and tofu sushi with fries
  • Intermezzo: Mango puree with ice and an envelope with a dollar for good luck
  • Main Course: Tofu! in a sweet and slightly spicy sauce, rice with lettuce and corn and jicama, a “kebab” of fried tofu balls, pineapple, eggplant in a spicy sauce
  • Sides: pasta with veggies (jicama, snow peas, green beans, carrots, lotus root), veggies for all (green beans, black mushrooms, corn, and sun-dried tomatoes)
  • Dessert: fruit salad and a candy

A special thanks to Chef Joseph Poon for his hospitality and wonderful personality.  He does walking tours of Philly’s Chinatown along with teaching cooking classes and hosting dinners.

This slideshow requires JavaScript.

Late Season Preserves (Spiced Cranberry Pear Jam)

Posted on

I can’t believe it’s already December.  I feel like I was JUST celebrating the holidays from LAST year.  And yet, here we are again.  I’ve been slowly making my way through some of the canned items I made this year.  I used up a quart of tomatoes, I gave away a few pints of sriracha daikons, and have thoroughly enjoyed the spicy green beans.  I am making TONS of those next year.  So delicious!

So, imagine my surprise when I thought I was done creating new projects.  It’s December!  Nothing’s in season…  Except maybe cranberries…  While the cranberries were probably not harvested yesterday, they are still in season currently.  If you didn’t try making your own cranberry sauce, you should FOR SURE make this.  It’s a very easy recipe with big rewards at the end.  You end up with a mostly tart and VERY pretty jam.  And the nice thing is that you only really need four ingredients.  The rest is up to you.  The recipe has been adapted from this one at the Food in Jars site.

Ingredients

  • 4 cups chopped pears (I used d’anjou)

    Pear Cranberry Ingredients

    Pear Cranberry Ingredients

  • 4 cups cleaned cranberries
  • 1.5 cups white sugar
  • 1.5 cups brown sugar
  • 2 tbsp lemon juice
  • 3-4 cardamom pods
  • 2-3 cloves
  • 2 tsp ground ginger
  • 1 cup water
Diced Pears

Diced Pears

Core and chop the pears into a fairly even dice.  This will allow your pears to cook more evenly.  Put the pears, cranberries, and sugar in the pan to let it marinade for about 10 minutes.  Add the spices and the water to the fruit and put the pan on high.

Everything in

Everything in

Bring the pot to a boil, then turn down the heat.  You want the mixture to bubble occasionally, but not a roaring boil.  You will need to stir your mixture every few minutes to keep the mixture from scorching on the bottom and being watery on the top.  Cook the mixture for about 20 to 25 minutes or until most of the liquid has cooked off then add in the lemon juice.

Jam cooking down

Jam cooking down

Take out the cardamom and cloves (if you can find them) and store the jam.  I decided to not can the jam and instead kept one cup in the fridge and put the other two in the freezer.  Not everything needs to be canned.  You can preserve your “bounty” by freezing.

The jam looks really pretty, so it would make a GREAT holiday gift for friends or family.  You really can’t mess this recipe up.  I added in the lemon juice at the very beginning.  I also didn’t exactly let the fruit sit before I started cooking it down.  Try experimenting with the spices.

Finished Jam

Finished Jam

Turkey Substitute Roundup

Posted on

So, I’ve been a vegetarian for half of my life now.  That means 15 Thanksgivings without turkey.  The first couple of years it was all about the sides.  I know PLENTY of people that aren’t vegetarians that prefer the sides anyway.  So, it didn’t really seem like that big of a deal to just not eat turkey.  Well, the years went on and my cooking skills did in fact increase (or at least I wasn’t burning things in the microwave anymore…).  I decided to throw a Thanksgiving holiday dinner for friends when I had moved to Baltimore, so I thought I should serve something “turkey like”.  Here are four different turkey substitutes that I have served at Thanksgivings or other holiday dinners.

Tofurky

This is the most well known substitute and when you tell people you are a vegetarian on thanksgiving, they will for sure ask if you are going to eat one.  There are some big pros to this item.  It’s both a protein source and has stuffing in one, so you don’t HAVE to make more stuffing.  The gravy that comes with it may look a little strange, but is actually quite good.  It’s actually the best prepared vegan gravy I’ve found.  The biggest downside I’ve found to the tofurky is that when it cools, it gets kind of rubbery.  The taste is fine, but the texture becomes slightly offensive.  I’ve never tried any of the “fancy” ways to prepare  the roast, but there are some fun recipes found on the site.  Tofurky is vegan.

Quorn Turk’y Roast

This was my second foray into a turkey substitute.  I had tried the naked cutlets and really liked them, so I wanted to try the roast.  THIS WAS GOOD.  Like really good. Like not just as a substitute good.  I’ve been told it both looks like and tastes very much like a pork loin, but I would have no idea.  The interesting thing about quorn is that it’s made from mycoprotein (mushroom derivative).  Before you condemn this product for being mushroom, it doesn’t actually taste like mushrooms.  My sister who HATES mushrooms loves this.  I would not follow the instructions on the box and cook the roast IN the packaging.  Take off the plastic and roast it with veggies.  I don’t eat this anymore as there is egg in the roast, but if I ate eggs this would be what I eat.

Field Roast

I wasn’t able to try the celebration roast, which apparently is pretty delicious, but I was able to snag a Hazelnut Cranberry Roast En Croute.  The texture is a bit like soft vegan sausage.  And I did not really see a distinction in between the sausage part and the stuffing that was supposed to be there.  BUT.  This was pretty tasty.  The inside was very flavorful and had lots of herb flavors.  I made this with some stuffing and some southern style kale for a Manucci thanksgiving this year.  I think it went over pretty well.  This is vegan and very delicious.

Gardein Holiday Roast

So, I’ve been saving the best for last.  This is by far the most delicious turkey substitute out there.  And I really wouldn’t even qualify the roast as only JUST good as a turkey substitute.  It’s just plain old DELICIOUS.  I actually went back to Whole Foods to try to get some more and they were completely sold out.  Gardein is pretty new in the vegan substitutes field, but it has quickly exploded into the field.  I haven’t found a bad product yet and I will continue to keep trying as many products as possible.  I actually followed the basic instructions by the blog Meet the Shannons to make the roast and stuffing.  FYI, make stuffing with cranberries in it from now on.  SO PRETTY!  The only downside to this product is the gravy.  It needs doctoring up.  For SURE add some spices like thyme, garlic, and rosemary.  It adds so much to the fairly bland gravy.  This is totally vegan.


Pumpkin Maple Rolls

Posted on

I love pumpkin.  It’s delicious and really good for you without all the added sugar to it (though I do love some sugar…).  And while you can buy canned pumpkin year round, I tend to sort of only want pumpkin during the fall/winter times.  I really want to at some point try to roast and make my own pumpkin puree, but I do love the convenience of canned pumpkin.  This will actually be the first of two pumpkin recipes that I’ve made recently.

I made these first two weeks ago for a brunch I had with a group of my running buddies.  We went up to the NCR trail and ran 10 miles first.  Then we went back to a friend’s house, where she hosted a VERY lovely brunch at her place, complete with protein shots and mimosas!  In an effort to want to try this recipe before I brought them to my in-laws, I made these first for the group and they went over so well, I knew I could make them for day after Thanksgiving brunch.  Thanks to Vegan Heartland for creating this recipe.  I really only modified it a touch to add more spice.  This recipe is split into three parts as there are three steps to assembling these rolls.

Dough Ingredients

  • 3/4 cup non-dairy milk

    Dough Ingredients

  • 1/2 cup pumpkin puree
  • 1/4 cup light oil
  • 1 tsp vanilla
  • 1 tsp lemon juice
  • 1 1/2 cups all purpose flour
  • 2 cups whole wheat flour
  • 1 tsp salt
  • 1/3 cup brown sugar
  • 1 1/2 tsp yeast

Pumpkin dough pre-rising

The official instructions have that you mix all the wet ingredients together in one bowl and sift together the dry ingredients in a separate bowl.  You would then add the wet ingredients to the dry and mix well.  I on the other hand just mix everything in one bowl, though I usually add all the wet ingredients first, then add the dry to them.  Knead the dough on a lightly floured surface for about 5 minutes, then place the dough back in the bowl to rise and cover with a towel.  This step can be done a day or so in advance if need be.

Filling Ingredients

  • 1/3 cup vegan margarine (I used Earth Balance)

    Maple filling ingredients

  • 1 tbsp cinnamon
  • 2 tsp pumpkin pie spice (plus more for dusting)
  • 1/4 cup sugar
  • 3 tbsp maple syrup

Rolled out dough

Whip together the filling ingredients.  Using a mixer will make the filling nice and light.  Set this aside.  When the dough has doubled in size, roll it out in a rectangle about 12×16.  Spread the filling evenly over the dough and all the way out to the edges.  Sprinkle some extra pumpkin pie spice for some added punch.  Roll the dough up so that it stays long.  Cut the dough in about 1 inch pieces and add to an oiled baking dish.  Cover and let rise until doubled in size.  This can be done the night/day before you want to bake them.  Bake the rolls at 350 F for 20 to 25 minutes.  Make the icing while the rolls are baking.

Rolling up dough

Icing Ingredients

  • 1/2 cup powdered sugar

    Icing ingredients

  • 3 tbsp non-dairy milk
  • 1/2 tsp vanilla
  • 1 tbsp maple syrup
  • 1/4 tsp cinnamon

Mix together all the ingredients.  Once the rolls are out of the oven, pour the icing evenly over the rolls.  ENJOY!

Pre baked rolls

Notes: Yes this may seem like a lot of work, but these are AMAZING.  Also, you really can make the dough a day or so before you need it then store in the refrigerator.  I don’t advise trying to add more pumpkin to the dough mixture without adding more flour.  It makes the dough pretty sticky.  Also, you can sub in honey or some other liquid sweetener other than maple syrup.  But syrup is very delicious, so I used it.

Ready to eat!